Example: Python + Flask
The best indicator of a healthy development workflow is a short feedback loop.
Kubernetes is a huge wrench in the works.
Let’s fix this.
In this example, we’re going to take you through a simple “hello world” server written in Python that uses Flask, a lightweight web application framework.
Consider watching this companion video if you prefer. Or come back to it afterward.
We’ll use Tilt to:
- Run the server on Kubernetes
- Measure the time from a code change to a new process
- Optimize that time for faster feedback
This particular example server doesn’t do much, but it’s useful to confirm that Tilt is working as expected in your environment.
All the code is in this repo:
To skip straight to the fully optimized setup, go to this subdirectory:
Step 0: The Simplest Deployment
Our server is just seven lines long, and all it does is serve us an HTML page:
from flask import Flask, render_template
app = Flask(__name__)


@app.route("/")
def serve():
    return render_template("index.html")


if __name__ == "__main__":
    app.run(port=8000)
To start this server on Kubernetes, we need three config files:
- A Dockerfile that builds the image
- A Kubernetes deployment that runs the image
- And finally, a Tiltfile that ties them together:
docker_build('example-python-image', '.')
k8s_yaml('kubernetes.yaml')
k8s_resource('example-python', port_forwards=8000)
The first line tells Tilt to build an image with the name example-python-image
in the current directory.
The second line tells Tilt to load the Kubernetes
Deployment
YAML. The image name in the docker_build call must match the container image
reference in the example-python Deployment.
The last line configures port-forwarding so that your server is
reachable at localhost:8000. The resource name in the k8s_resource call
must match the Deployment’s metadata.name in kubernetes.yaml.
Try it! Run:
git clone https://github.com/tilt-dev/tilt-example-python
cd tilt-example-python/0-base
tilt up
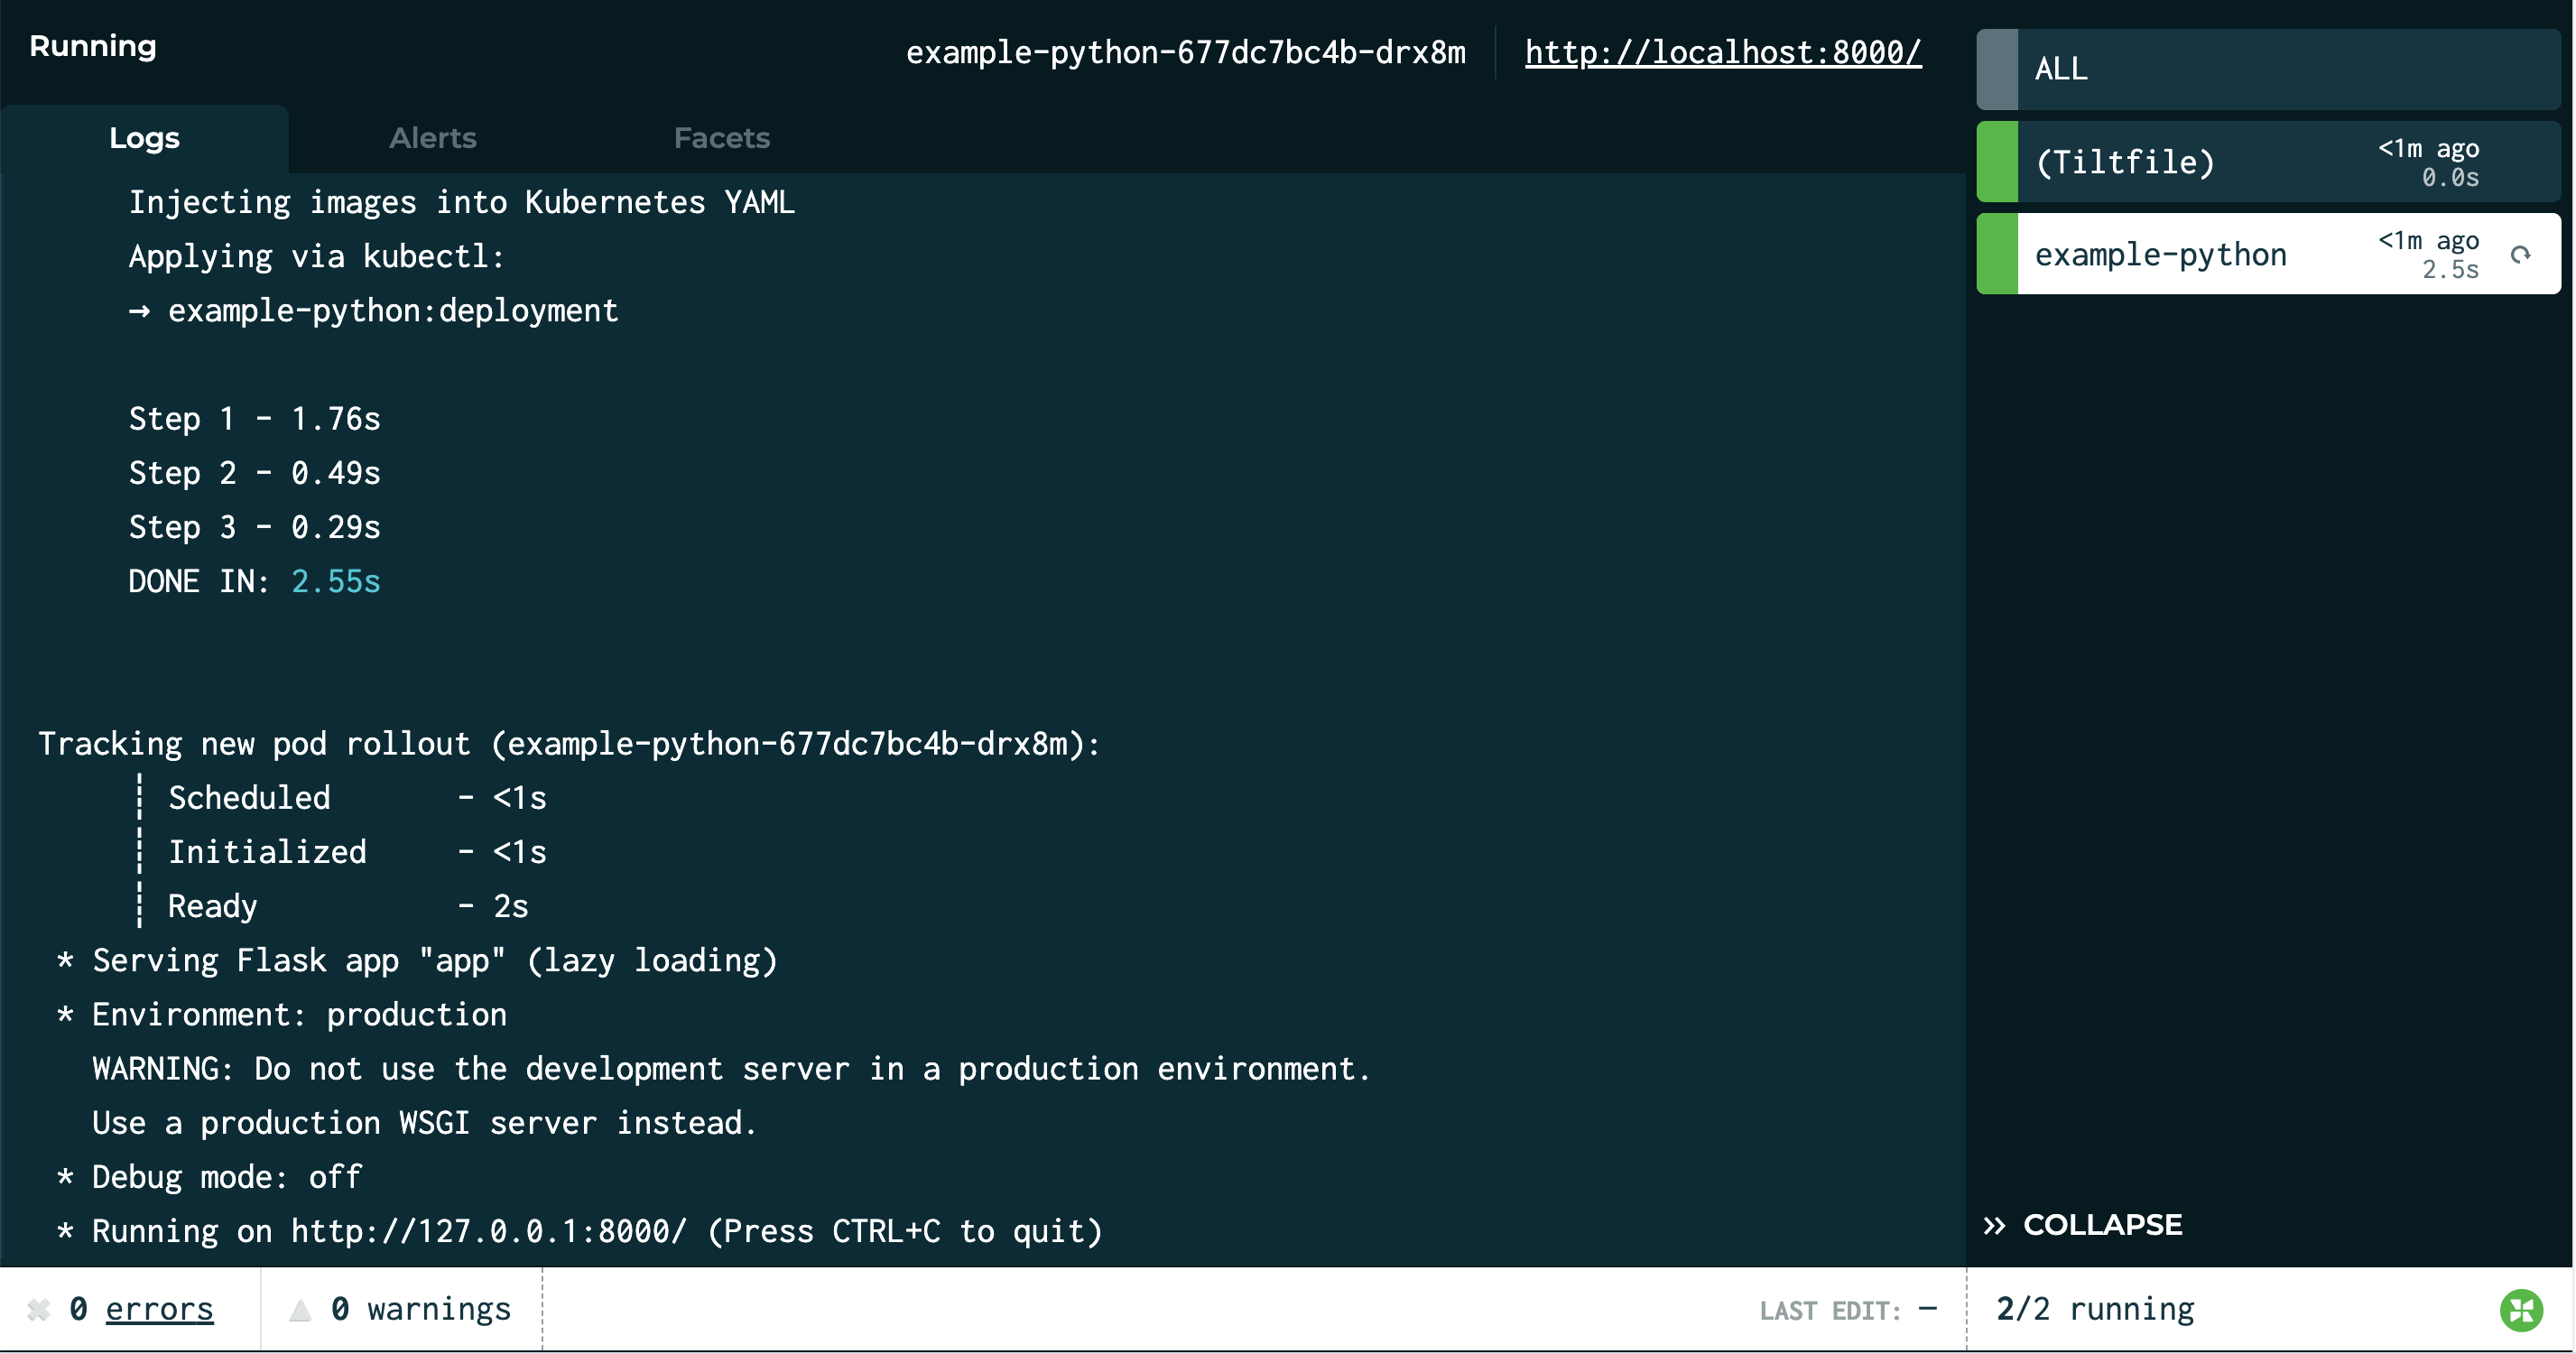
Tilt will open a browser showing the web UI, a unified view that shows you app status and logs. Your terminal will also turn into a status box if you’d like to watch your server come up there.
When the server is ready, you will see the status icon turn green. The log pane will display some output from Flask, starting with:
Serving Flask app “app”

Step 1: Let’s Add Benchmark Trickery
Before we try to make this faster, let’s measure it.
Using local_resource, you can direct Tilt to execute existing scripts or arbitrary shell commands on your own machine, and manage them from your sidebar like any other Tilt resource. We’re going to use this functionality to benchmark our deployments.
First, we add a local_resource to our
Tiltfile
that records the current time, then kicks off an update.
# Records the current time, then kicks off a server update.
# Normally, you would let Tilt do deploys automatically, but this
# shows you how to set up a custom workflow that measures it.
local_resource(
  'deploy',
  'date +%s > start-time.txt'
)
…
k8s_resource('example-python', port_forwards=8000,
             resource_deps=['deploy'])
The local_resource() call creates a local resource named deploy. The second
argument is the command that it runs.
We’ve also modified our server itself to read that start time and print the time elapsed:
def get_update_time_secs() -> float:
    with open('/app/start-time.txt', 'r') as file:
        start_ns_since_epoch = float(file.read().strip())

    start_secs_since_epoch = start_ns_since_epoch / 10**9
    now_secs_since_epoch = time.time()

    return round(now_secs_since_epoch - start_secs_since_epoch, 2)
...
if __name__ == "__main__":
    UPDATE_TIME = get_update_time_secs()
    app.run(port=8000)
Whenever the app starts up, it calls get_update_time_secs(), does the math to figure out the time elapsed since the timestamp in start-time.txt, and stores that value in a global variable; when the app serves index.html, it passes that value into the HTML template so that it shows up in the webpage.
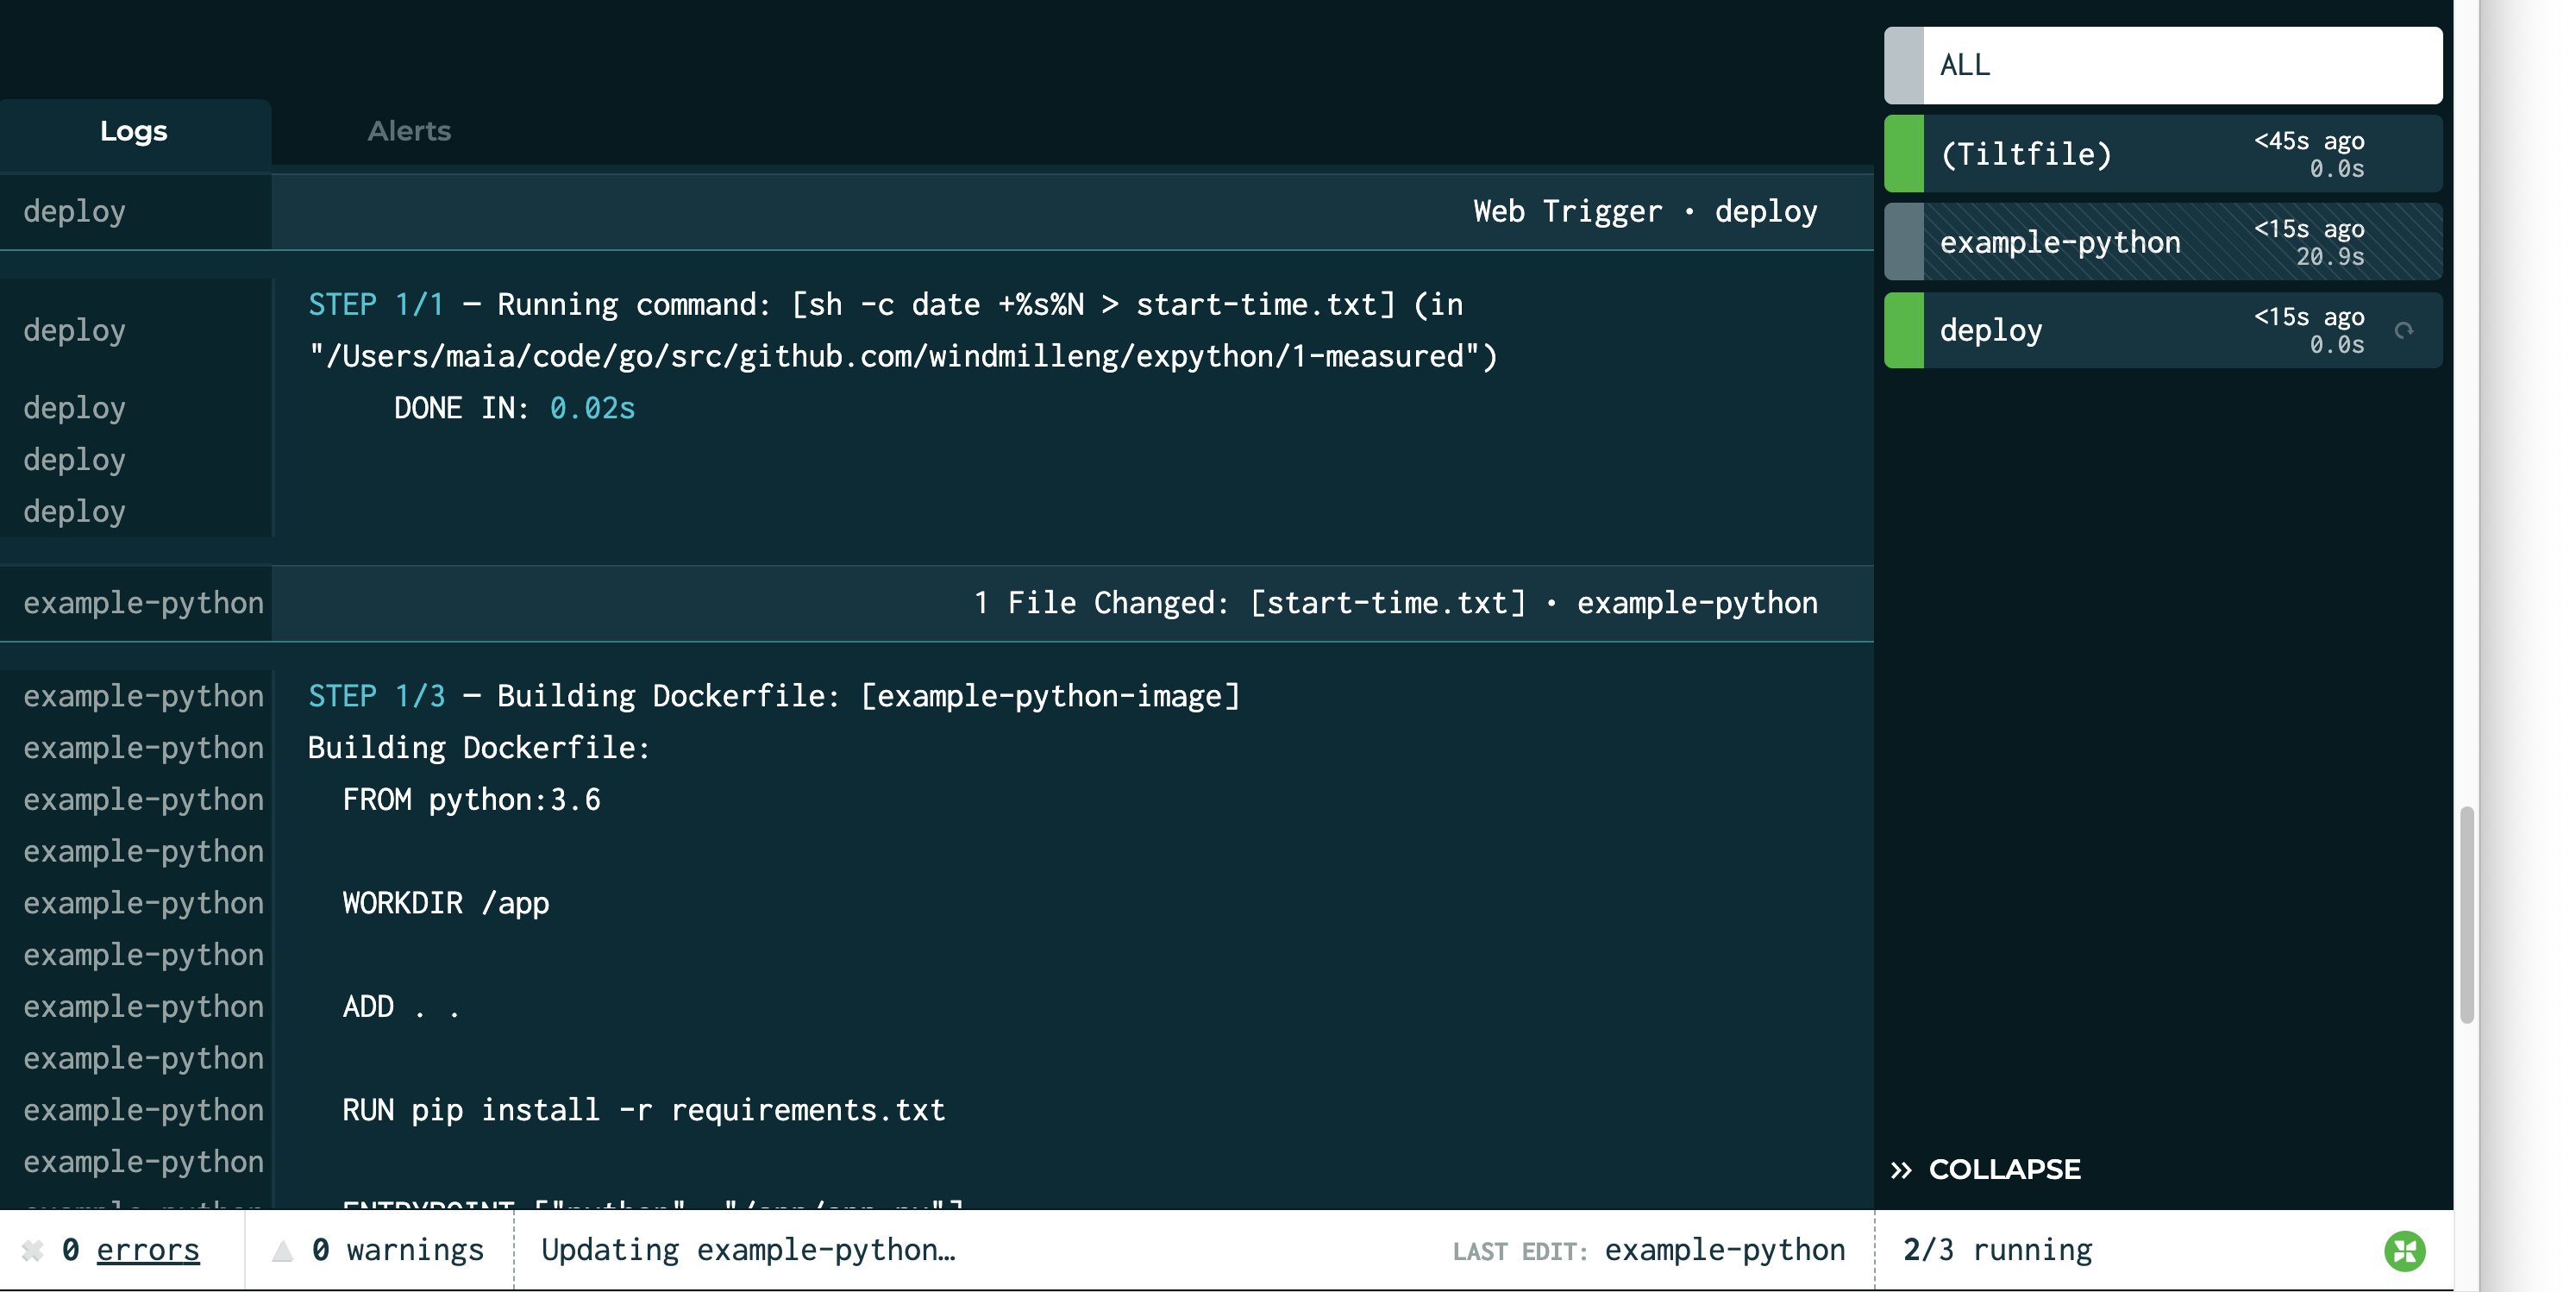
See that button next to the deploy resource?
Let’s click it and see what happens!

| Approach | Deploy Time1 |
|---|---|
| Naive | 10-11s |
If you look closely, the elapsed time displayed in the Tilt sidebar is different than the benchmark our app logged. That’s OK! In microservice development, there are many benchmarks we care about – the time to build the image, the time to schedule the process, and the time until the server is ready to serve traffic.
Tilt offers you some default benchmarks, and the tools to capture your own.
Our benchmarks show this is slow. Can we do better?
Step 2: Why Is the Docker Build So Slow?
The first thing I notice when I click “deploy” is a bunch of logs from pip install; and not just once, but every dang time. This is a hint that we can optimize our Dockerfile to be smarter about caching. With a little rearranging, our new Dockerfile looks like this:
ADD requirements.txt .
RUN pip install -r requirements.txt

ADD . .
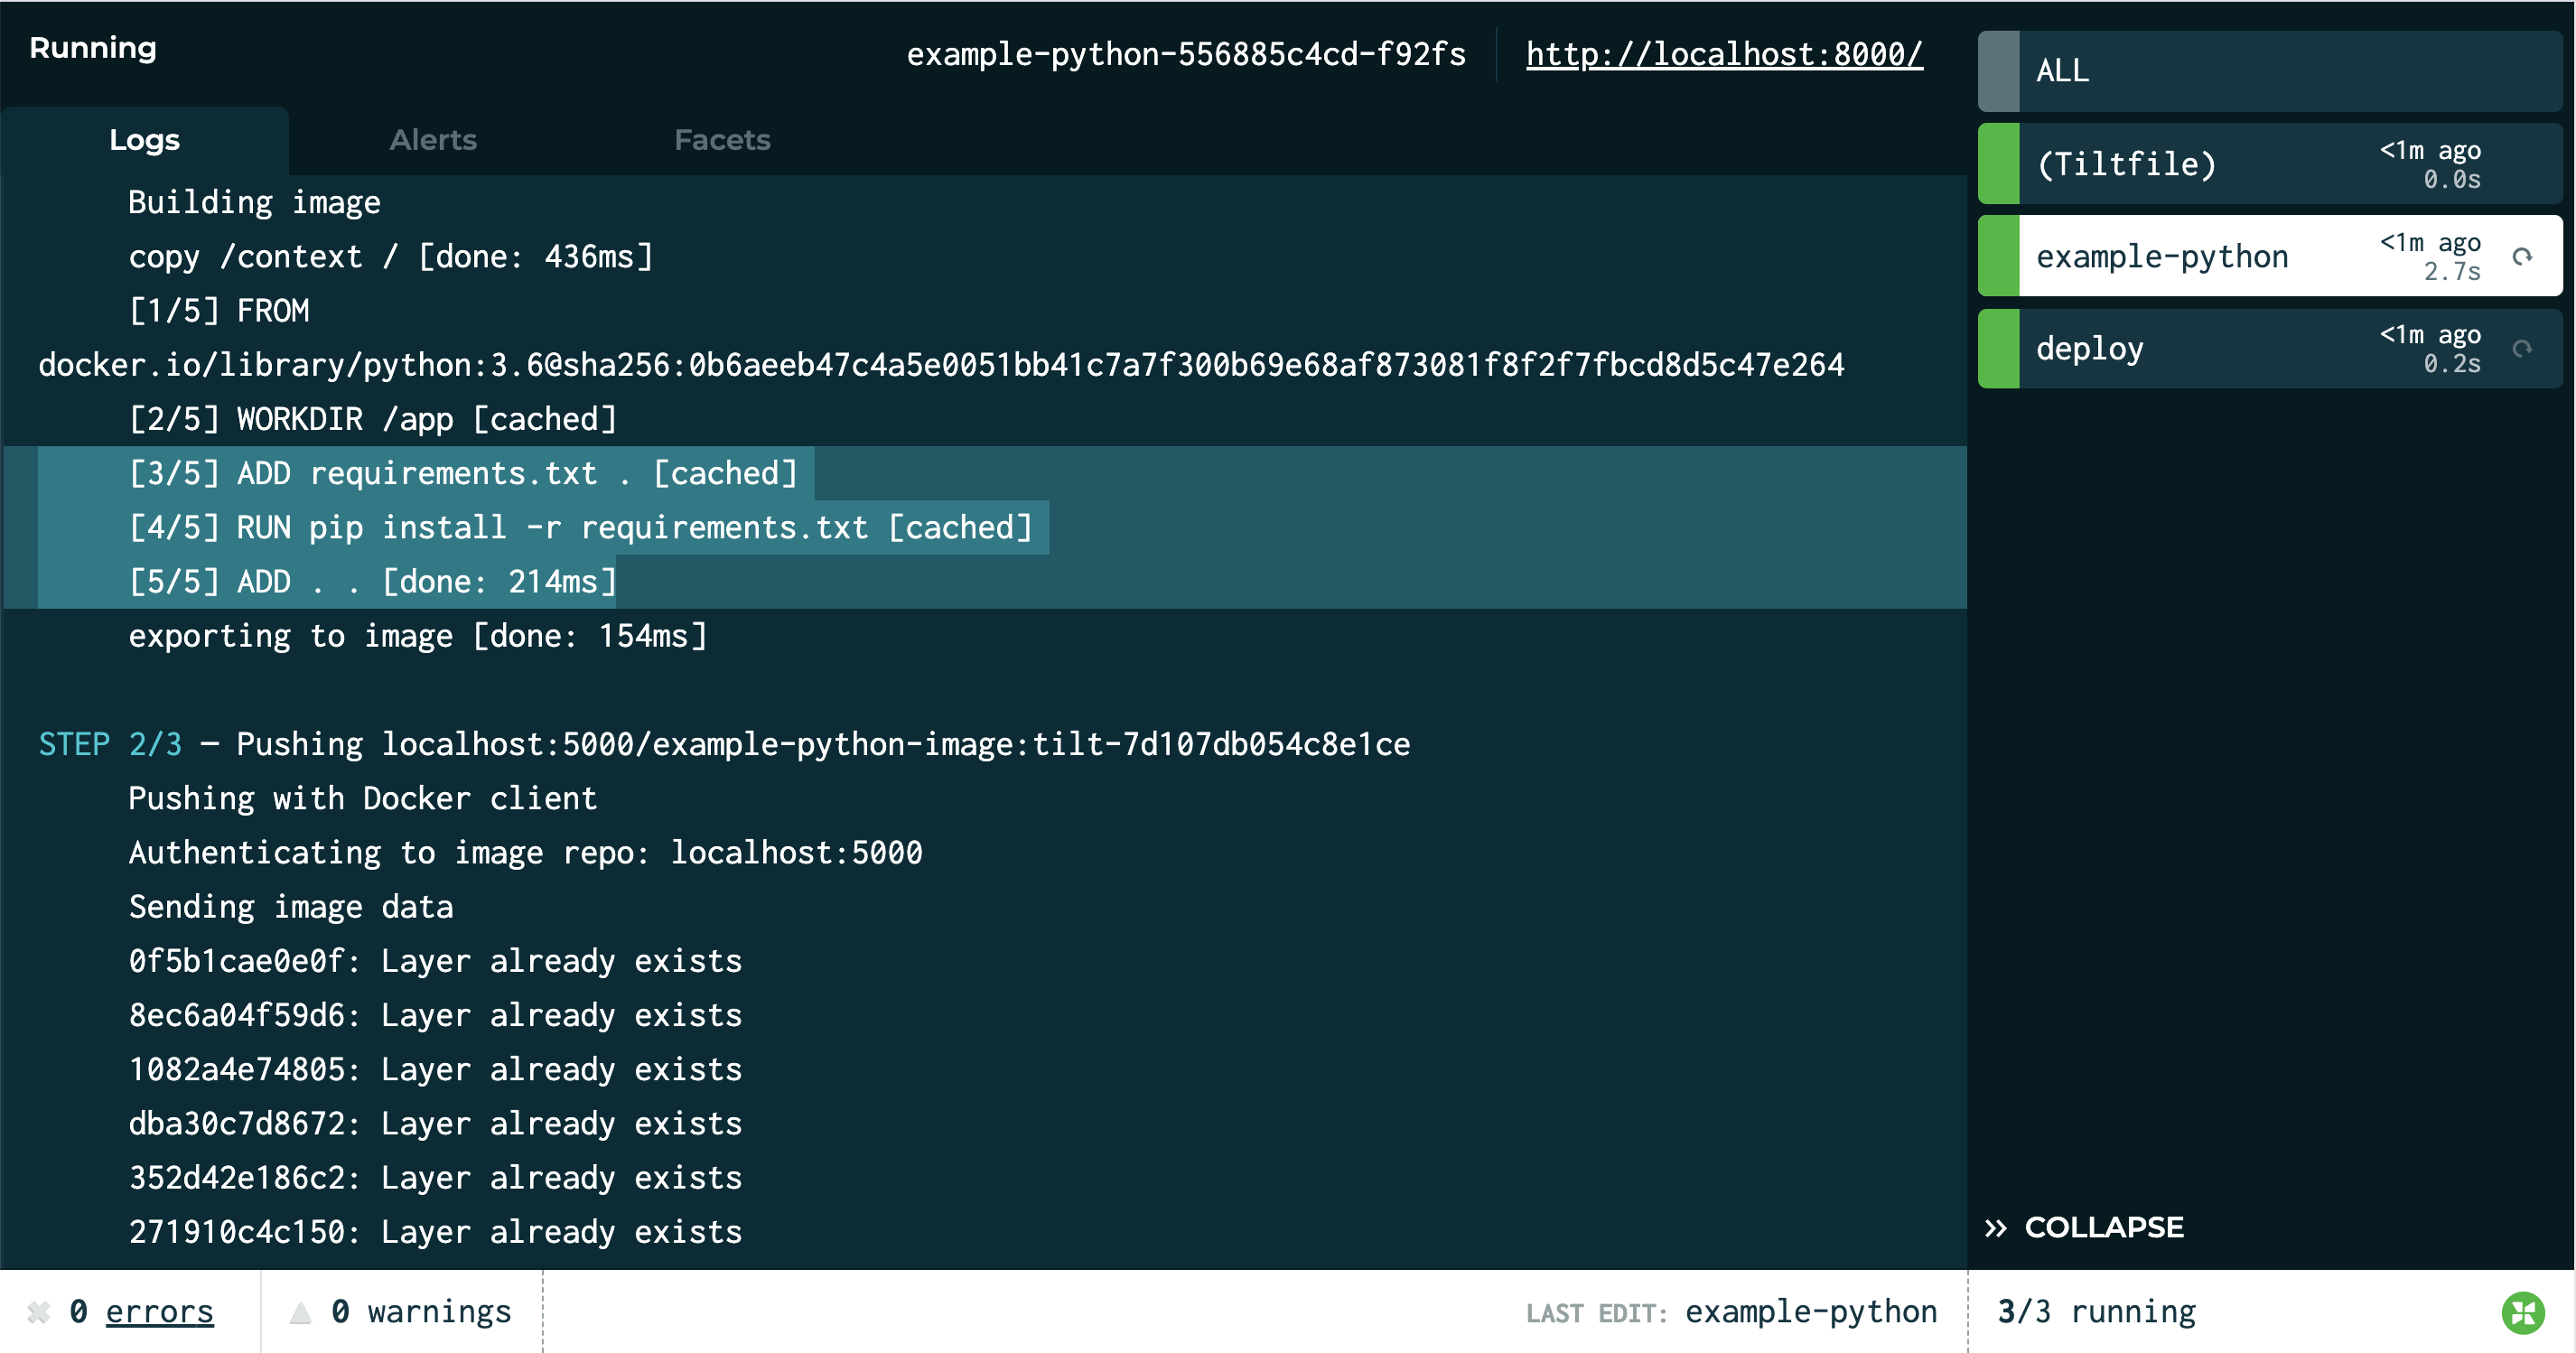
Here’s what it looks like when we build with our new Dockerfile:

Hooray, we’re now using the cache instead of running pip install for every single build. (For more on the principles at work here, check out this guide.)
Here’s what our timing looks like now:
| Approach | Deploy Time |
|---|---|
| Naive | 10-11s |
| Optimized Dockerfile | 2.5-3.1s |
Pretty good! But Tilt has some tricks up its sleeve to make it even faster.
Step 3: Let’s Optimize It Even More
When we make a change to a file, we currently have to build an image, deploy new Kubernetes configs, and wait for Kubernetes to schedule the pod.
With Tilt, we can skip all of these steps, and instead
live_update the pod in place.
Our new Tiltfile contains the following new code:
# Add a live_update rule to our docker_build
congrats = "🎉 Congrats, you ran a live_update! 🎉"
docker_build('example-python-image', '.', build_args={'flask_debug': 'True'},
    live_update=[
        sync('.', '/app'),
        run('cd /app && pip install -r requirements.txt',
            trigger='./requirements.txt'),

        # if all that changed was start-time.txt, make sure the server
        # reloads so that it will reflect the new startup time
        run('touch /app/app.py', trigger='./start-time.txt'),

        # add a congrats message!
        run('sed -i "s/Hello cats!/{}/g" /app/templates/index.html'.
            format(congrats)),
])
We’ve added two new parameters to docker_build(): build_args and live_update. Let’s look at the latter first.
When a live_update is triggered, Tilt will, in order:
- Sync the code from the current directory (
.) into the container at directory/app. - IF
requirements.txthas changed, runpip install - Poke
app.pyif necessary to make sure that Flask reloads the server - Congratulate you on finishing this guide!
The second additional parameter, build_args={'flask_debug': 'True'}, corresponds to this Dockerfile change:
# Default value; will be overridden by build-args, if passed
ARG flask_debug=False

ENV FLASK_DEBUG $flask_debug
Together, these changes mean that when we build this Dockerfile via this Tiltfile, our Flask app will run in development mode. When in development mode, Flask watches for file changes and reloads the server when necessary.
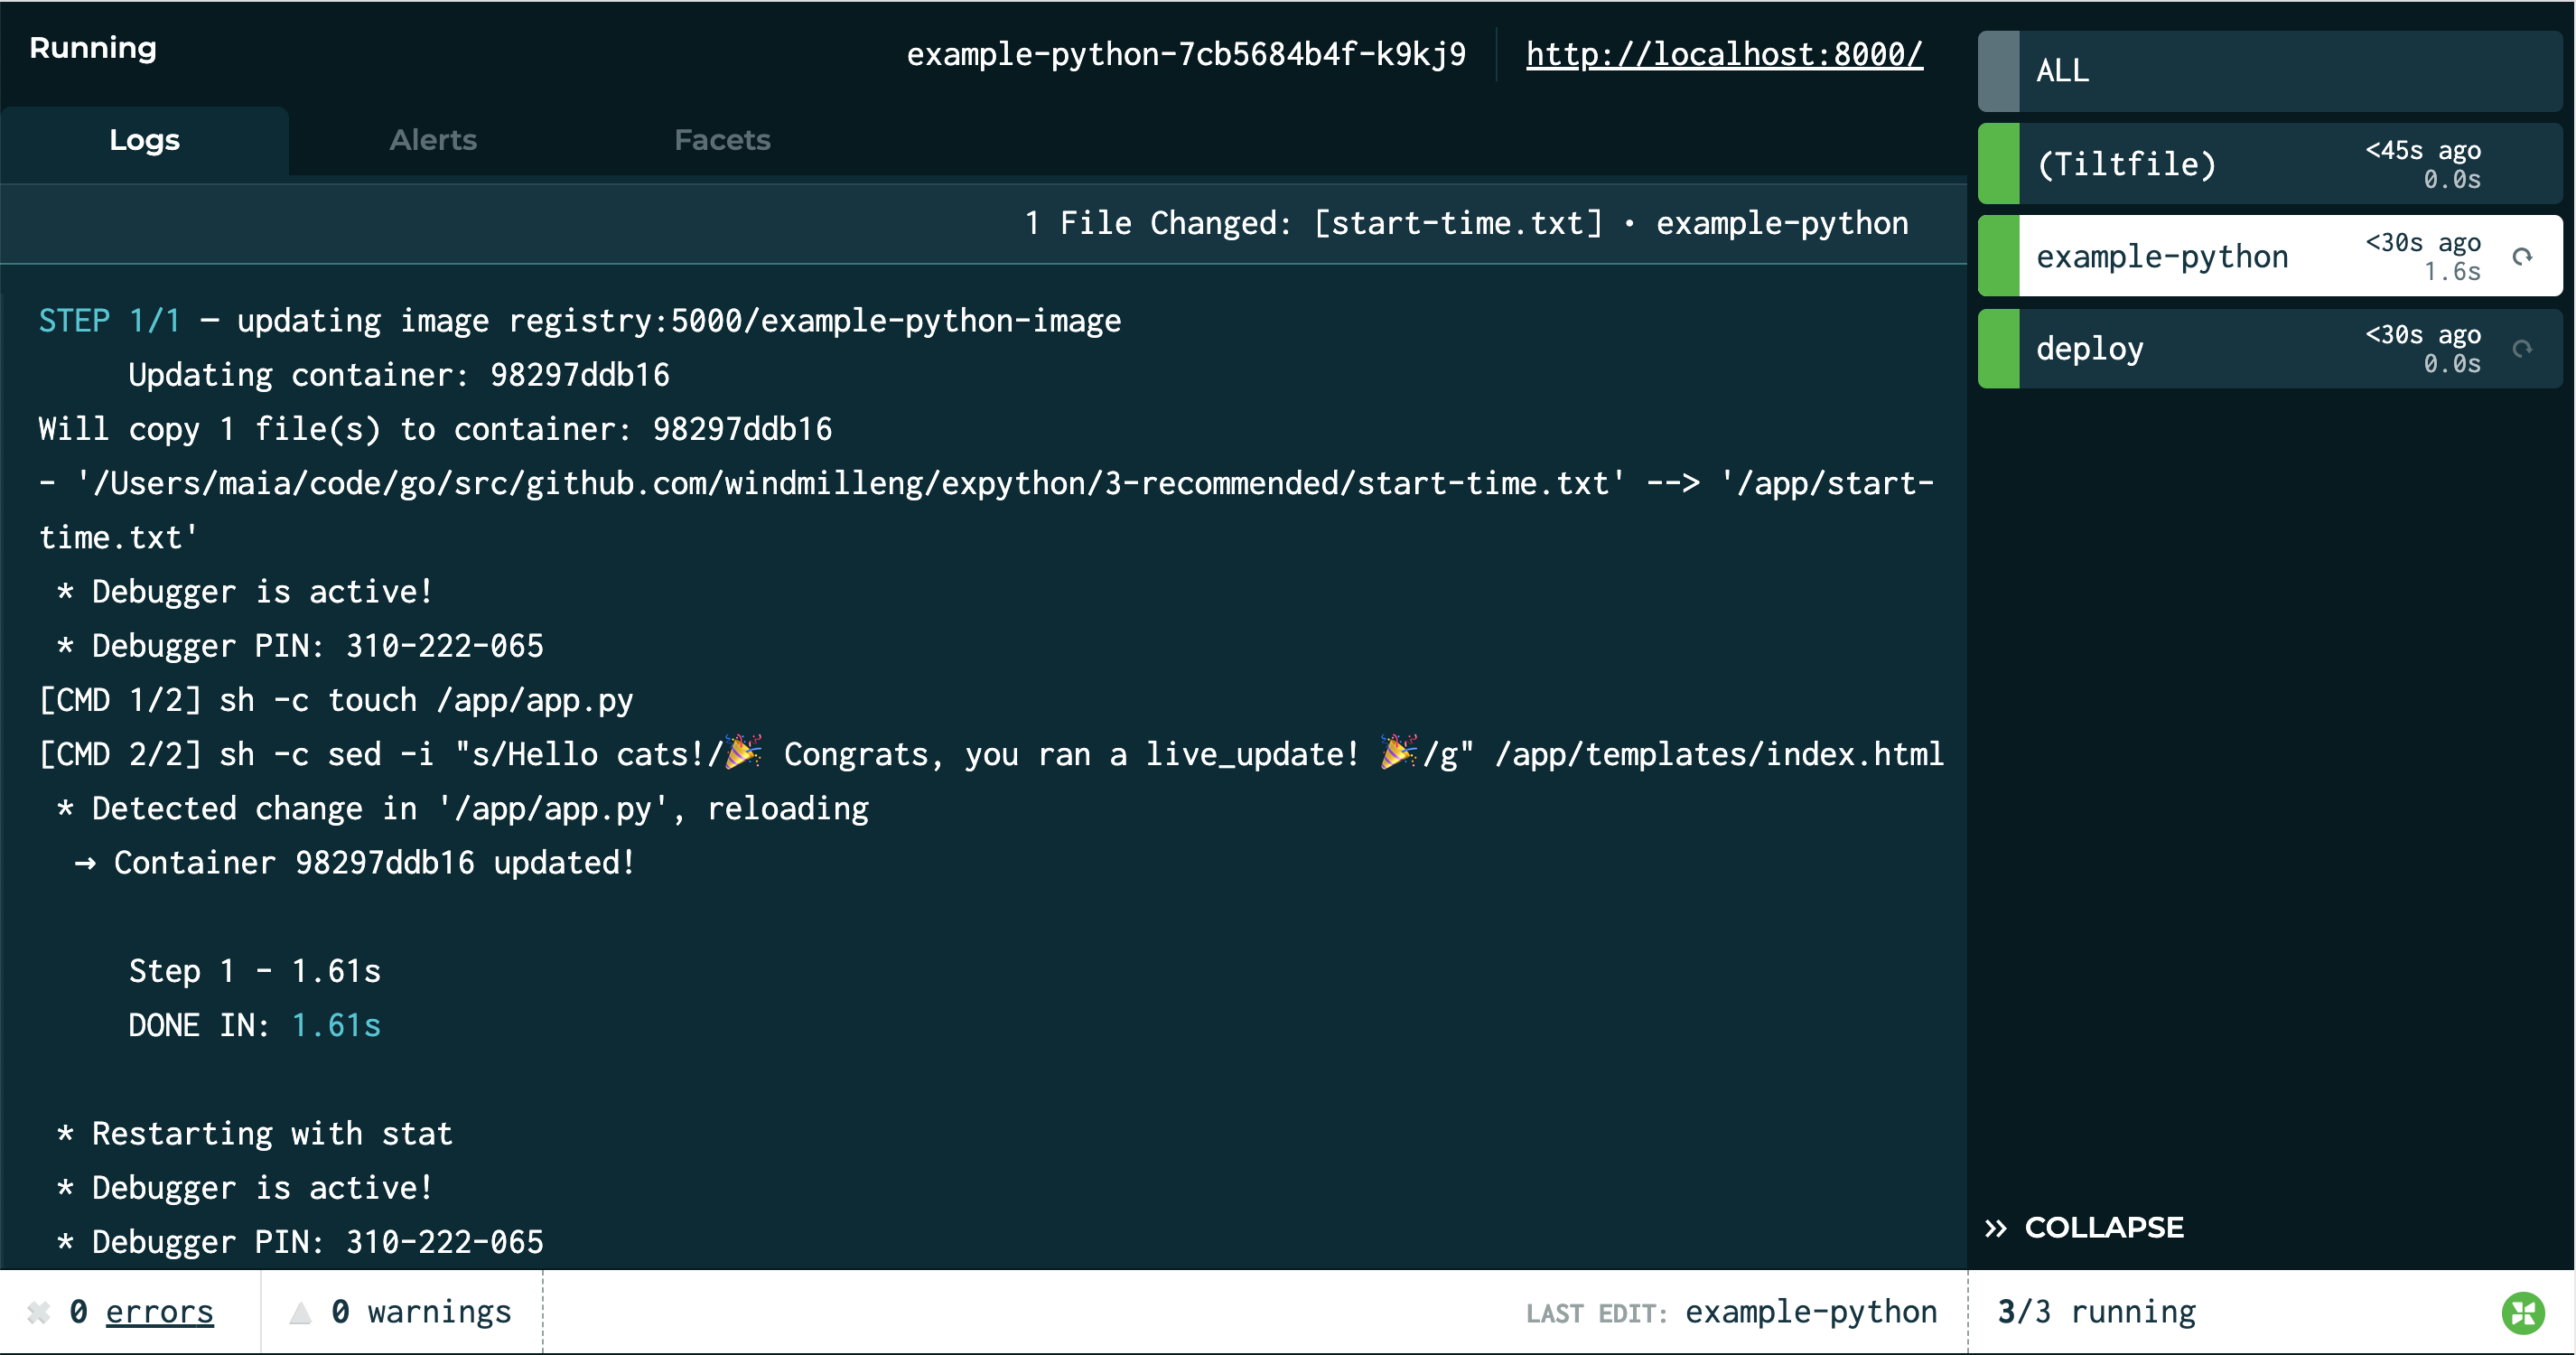
Let’s see what this new configuration looks like in action:

Tilt was able to update the container in less than two seconds! (And a chunk of that time was overhead from Flask, not from Tilt.)
Our Recommendation
Final Score
| Approach | Deploy Time |
|---|---|
| Naive | 10-11s |
| Optimized Dockerfile | 2.5-3.1s |
| With live_update | 1-2s |
You can try the server here:
This is a very simple example, but we hope it gives you a good starting point for running your Flask app (or other Python app) via Tilt!
Further Reading
CI
Once you’re done configuring your project, set up a CI test to ensure
your setup doesn’t break! In the example repo, CircleCI uses
ctlptl to create a single-use Kubernetes
cluster. The test script invokes tilt ci. The tilt ci command deploys all
services in a Tiltfile and exits successfully if they’re healthy.
Other sample Python projects:
- Tilt Avatars, a microservice app with a Python API backend.
- abc123 is a mini microservice app with a Python server called
numbers - Our blog post about Live Update includes an example Python server
- Servantes, our multi-language microservice demo app, contains a Python service called
hypothesizer
Examples in other languages:
-
Tilt’s first deployment of a service takes a few seconds longer than subsequent ones, due to some behind-the-scenes setup. Measurements in this guide focus on non-initial builds. ↩